Build-A-Brick Workshop – A Bonding Session in Central Singapore
AMY ANG shares her experience trying out Bearskin decorating.
BY
Amy Ang
Publicity Manager
Hype Issue #55
Published on
July 16, 2022

If you’re complaining about the lack of interesting things to do in Singapore and you want to try something new, here’s a workshop where you get to decorate your own Bearskin, a bear figurine that can stand on its own like a display toy.
The Build-A-Brick Studio in Tai Seng was opened by Ms Zina Ng, 23 earlier this year. I was invited down to the studio with my fellow journalist, Ngiok, to try out the workshop. We did the two hour session which included a large Bearskin (34cm) and a resin coaster that encompassed an Instax polaroid picture. The session is priced at $98 per person. If you choose to only do the Bearskin without the resin coaster, it is priced at $80 per person and the Bearskin will come with a bear keychain instead.
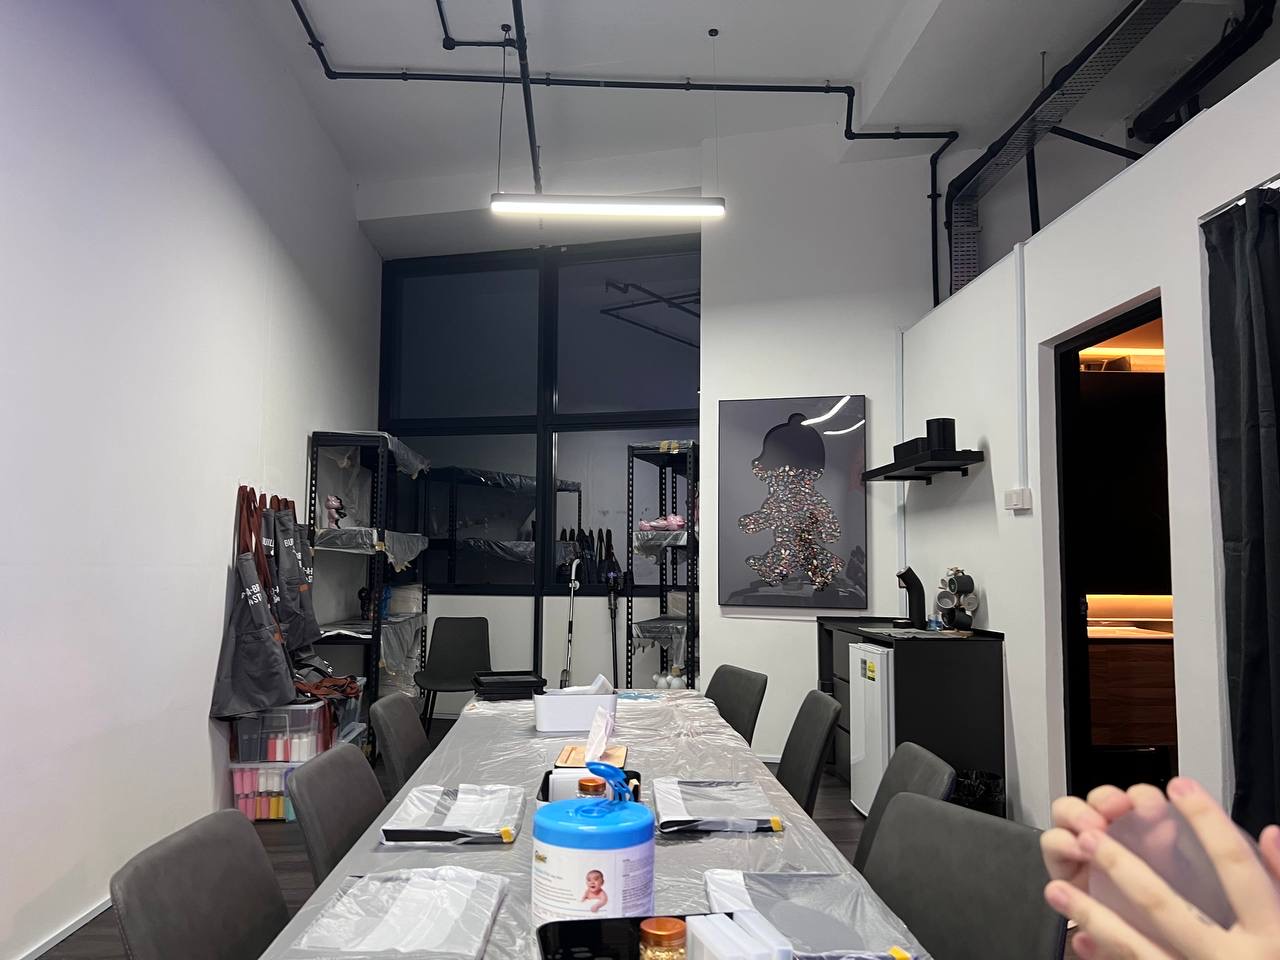
The first thing that might be an issue for some is the location. The studio’s closest MRT station is Tai Seng and it can be a tricky area to navigate as it is located in an industrial area. It also took a bit of walking around to figure out which lift to use (Lift Lobby 4) before arriving at the studio.
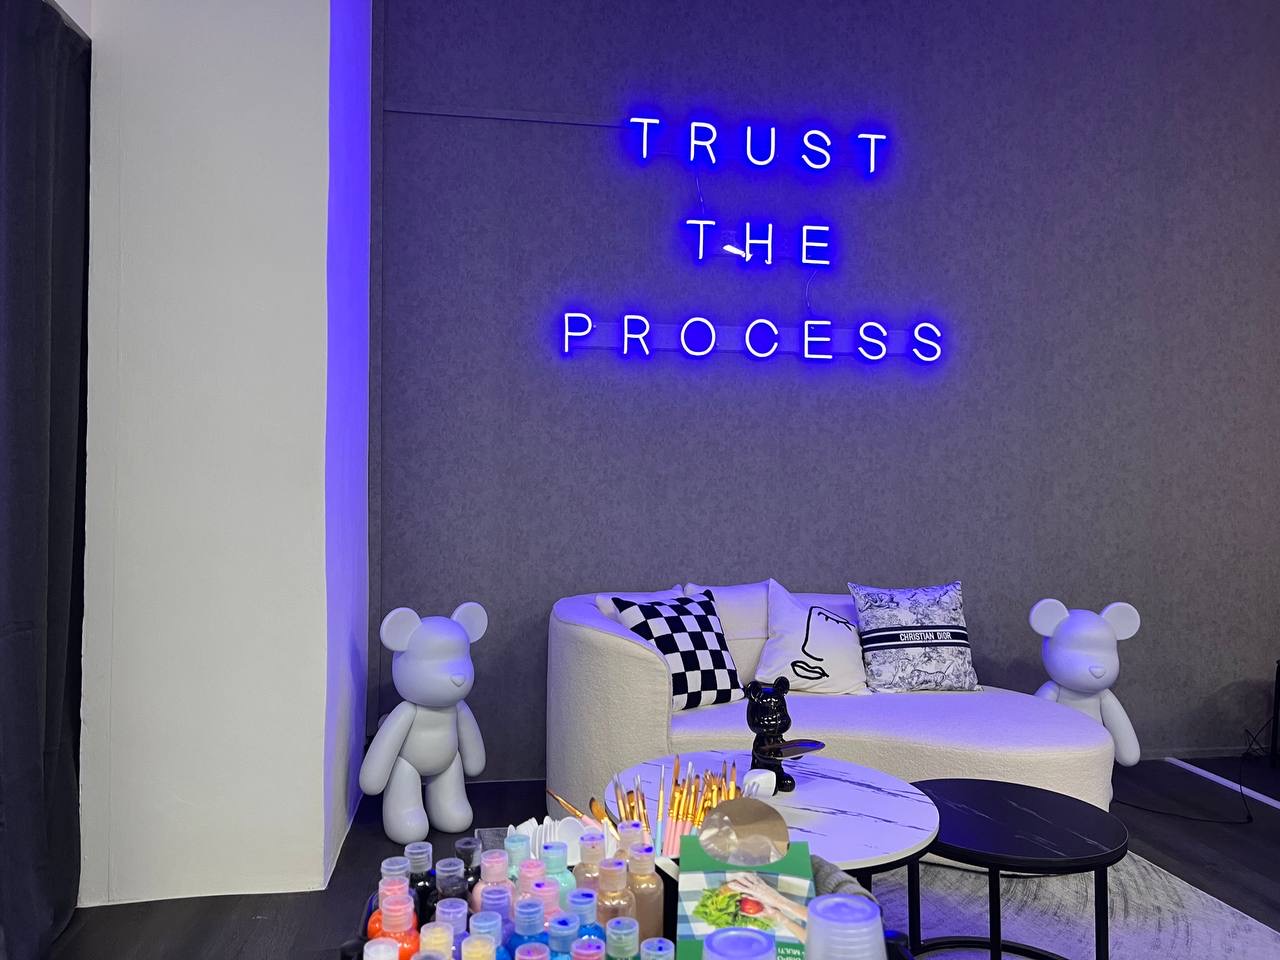
The signature sofa and neon lights as the centrepiece in the studio (left) and the studio area (right). Photo taken by Amy Ang.
We were greeted with a blissful blast of air-conditioning. Yes, the place is air-conditioned. (A sigh of relief, please.) We had to take off our shoes at the entrance, so it’s probably a good idea to wear socks when you come to the studio, so that your feet don’t get cold during the two-hour session. Upon arriving, we were immediately greeted by Ms Ng, who ushered us to our seats and brought out the materials that were needed for the session: a plastic cup, a plastic spoon, and the Bearskin itself.
We both got our own plain Bearskin which we had to stick onto a plastic base so that the figurine could stand sturdily. For some reason, I struggled for a good five minutes attempting to take off the stickers to stick my Bearskin to the plastic base. Ngiok, on the other hand, fared much better than me.
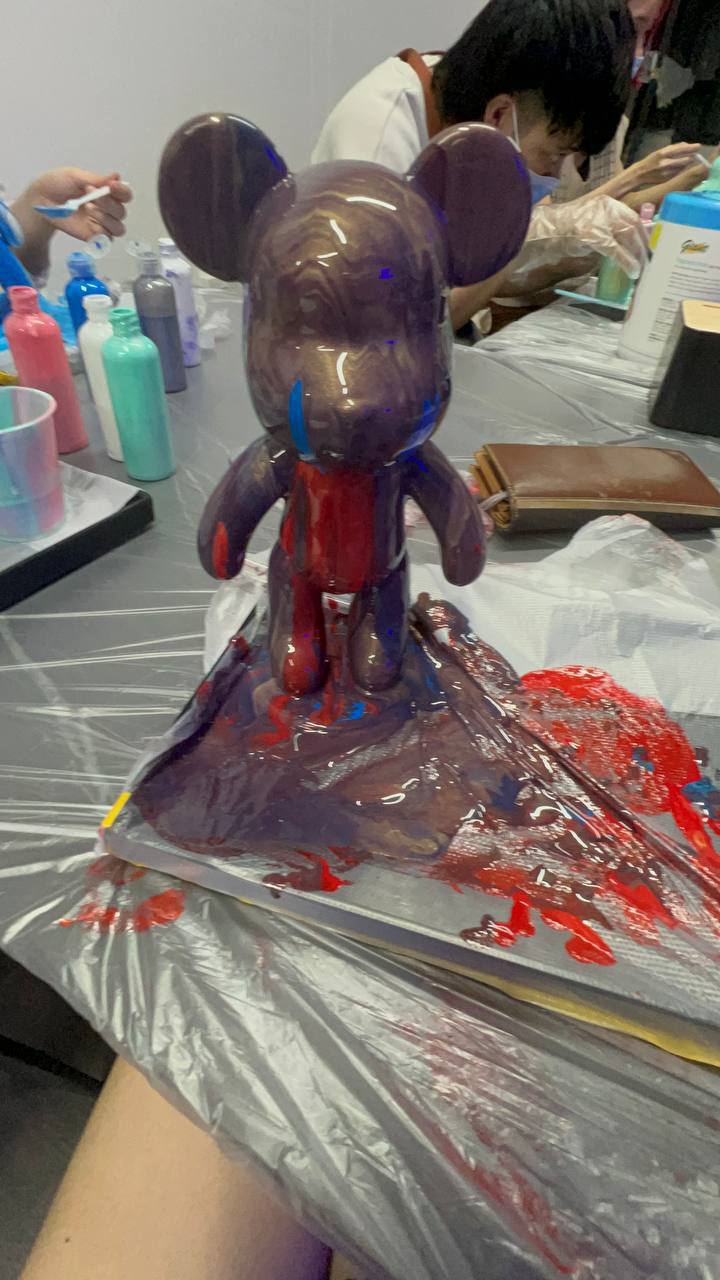
Ms Ng then began to explain to us how to best ‘paint’ the bear. The whole concept is to pour paint over the figurine, so that the paint flows down and creates a cool and streaky effect, instead of painting it with a paintbrush. The design depends entirely on the paint flowing down the bear to form an abstract design. It is also the reason why the Bearskin is sometimes referred to as a ‘Fluidbear’.
We got to choose three paint bottles from a series of colours, including silver and gold. I decided to go with red, blue and gold with a grand idea in mind. (Spoiler: It did not go the way I envisioned.)
Before we began our work on the bear, both of us got our own aprons to wear in order to prevent paint from getting onto our clothes. I started off by pouring red over my bear, then mixing in some streaks of blue. My idea was to create a red bear with blue socks, with two drops of blue to form tears on the face.
Well, thanks to colour theory, my bear ended up purple. I tried to fix it by adding the gold paint so it looked sparkly. While everyone else was doing pretty pastel colours, my bear ended up looking possessed.
Ngiok was doing pretty well with her pastel purple bear. As for me, well, I tried. We got to sit side-by-side with other customers as well, so if you’re afraid of awkwardness, come with a friend as most people came with their friends or significant other.
Amy’s Bearskin, featuring the colours she used (left) and Ngiok assembling her resin coaster. (right). Photos taken by Amy Ang.
After we completed our bears, we passed them to Ms Ng. The bear takes a couple of days to dry at the studio, so Ngiok came back a few days later to collect both of our bears. For those who would rather have the bear sent to them, a $15 islandwide courier option is available.
As our session also came with a resin coaster, Ms Ng told us that we could first take an Instax polaroid in the studio before beginning on our resin coaster, since many people usually use the polaroid as the centrepiece in their coaster. Both Ngiok and I got an individual polaroid of us sitting on the sofa under the neon lights. I thought it was a really cute concept as we could keep a physical memory of the workshop. The camera they use allows for multiple takes since it’s digital. If you think your smile was too awkward and you want another picture, you can feel free to let them know.
But I came prepared with a sticker of my idol, Dilireba Dilmurat, a Chinese actress. She’s been in my wallet for almost three years now. I dug it out and made her my centrepiece. So, here’s a tip: If you don’t want to use the Polaroid picture you just took at the studio, bring a picture you want to frame in the resin coaster. Make sure it’s not bigger than an Instax film.

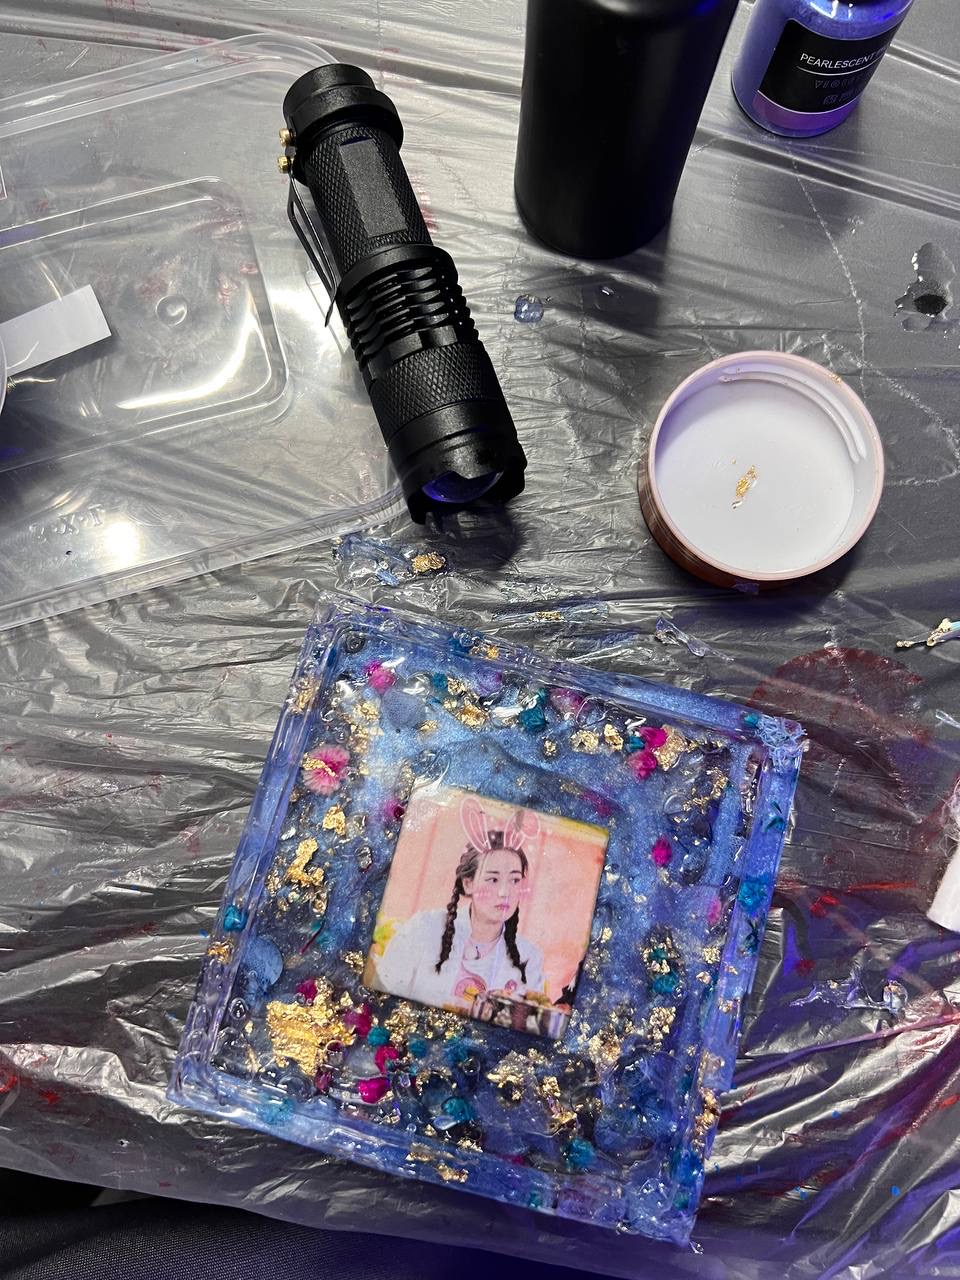
The polaroid picture taken in the studio at the photo spot (left) and Amy’s resin coaster featuring Dilireba Dilmurat in the coaster (right). Photos taken by Amy Ang.
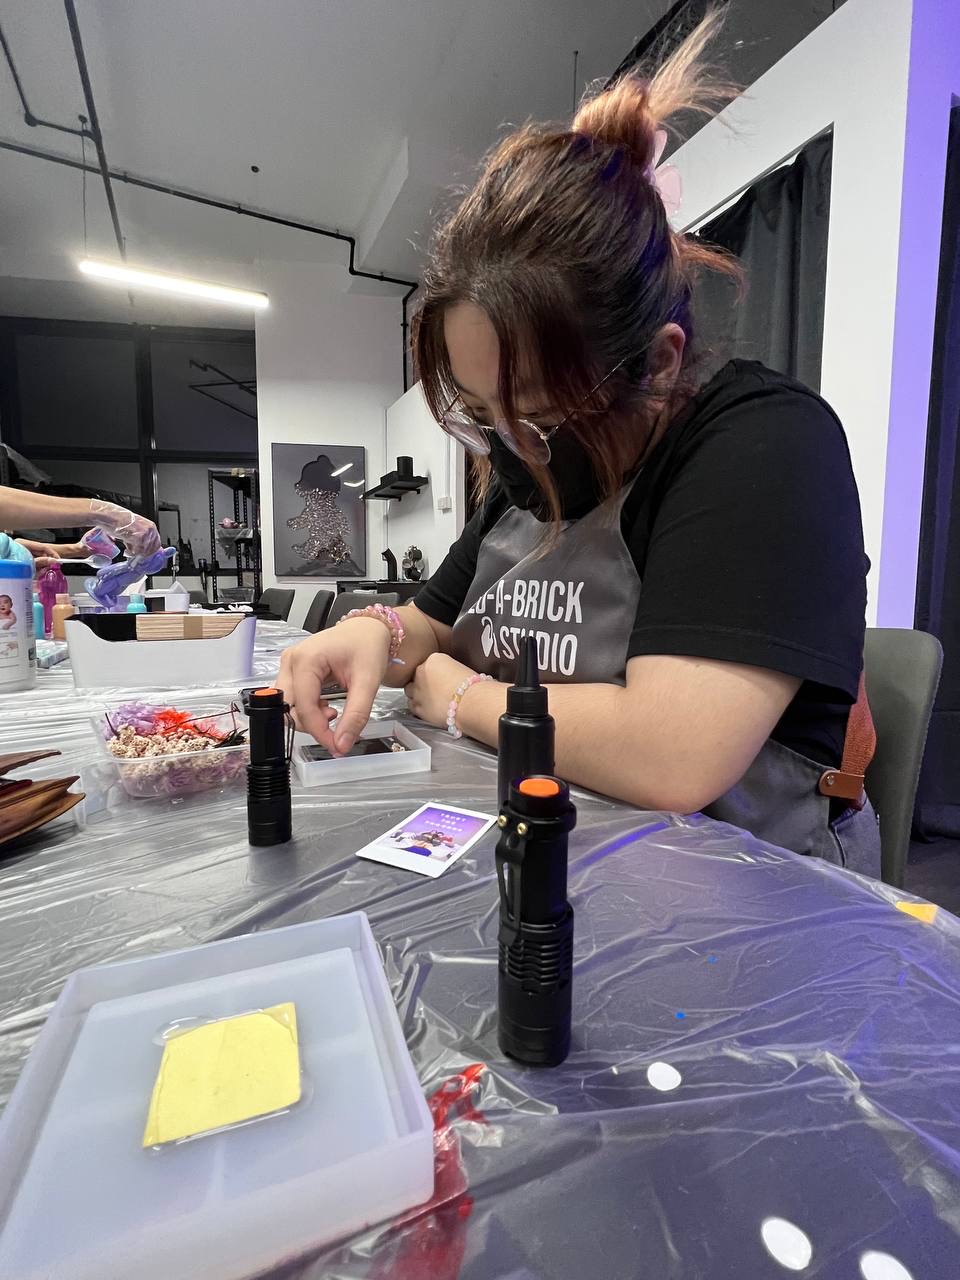
The studio provided us with a bottle of resin that hardened under the ultra-violet (UV) torchlight provided for us. There were a selection of decorations we could choose from, such as flowers and even gold leaves. We could also dye our resin with the colouring provided.
To have a more three-dimensional (3D) coaster, I layered all my flowers and gold leaves over many layers of resin, which I had to cure slowly each time. You could use the time to chat about life and complain about work or school, it’s kind of therapeutic.
Waiting for the resin to harden is definitely not fun for my fellow impatient friends. I felt like a robot moving the light back and forth at a constant speed. Beep, beep, I’m a 3D printer.
“I’ve used epoxy resin before to make coasters like these, never UV resin, so it’s a pretty new experience for me.” Ngiok said. “But I like that it’s a lot faster than the normal epoxy which can take up to a few days to cure and harden. As long as there’s exposure to UV light, the UV resin hardens pretty fast and is just as solid as other resins.”
I was too impatient, so parts of my coaster weren’t fully formed. Ms Ng gave me a bag with the studio’s name on it to bring the coaster home. I let mine sit under the sun for two days to fully harden. It would’ve been nice if there had been a way to make sure the resin had fully cured before I brought the coaster home.
For future customers, the resin coaster experience might differ slightly as Ms Ng has changed to Epoxy Resin instead.
Overall, I found this experience really fun. It’ll be a great bonding experience with your close friends and significant others because we all know your friends will end up making fun of your Bearskin even if it’s the best Bearskin anyone has ever seen.
According to Ngiok, “you get to explore the depths of each other’s creativity and create new memories together through this unique experience. It’ll be memorable for you and your loved ones.”
I would personally recommend this to anyone looking for a simple and easy activity. It’s on par with painting on a canvas except it’s a little bit more eccentric and you get to bring a bear home instead of just a canvas. However, if you require something more thrilling, then this workshop might not be for you. It’s a lot of sitting around and concentrating on your handiwork.
Until the next time I try something different and new.
Experience: ⅘ stars
Ambience: 5/5 stars
For couples and friends?: Yes
Can I do this alone: I wouldn’t be able to, because it’s a bit lonely going alone, but each to their own.
Verdict:


At the beginning, I was still puzzled. Since I read your article, I have been very impressed. It has provided a lot of innovative ideas for my thesis related to gate.io. Thank u. But I still have some doubts, can you help me? Thanks.
I am a student of BAK College. The recent paper competition gave me a lot of headaches, and I checked a lot of information. Finally, after reading your article, it suddenly dawned on me that I can still have such an idea. grateful. But I still have some questions, hope you can help me.
coffee shop vibes
I don’t think the title of your article matches the content lol. Just kidding, mainly because I had some doubts after reading the article. https://accounts.binance.com/ph/register?ref=RQUR4BEO
music for stress relief
Thanks for sharing. I read many of your blog posts, cool, your blog is very good.
Thank you for your sharing. I am worried that I lack creative ideas. It is your article that makes me full of hope. Thank you. But, I have a question, can you help me?
Can you be more specific about the content of your article? After reading it, I still have some doubts. Hope you can help me.